A Storage Grid is Born
Coming in at just over 6 months after I first detailed then plan, it is time for a bit of an update.
The first part of the update is that my initial estimate of "a few weeks, and 10 times the cost of just buying some containers" was way off. It turns out when you buy the cheapest printer you can find it constantly has issues you have to learn to troubleshoot, and you spend more time pumping out copies of Benchy than storage containers. There will probably be a follow up article on some of the issues with living in the bargain bin for 3D printers, so here I want to focus on what has worked, and where things sit.
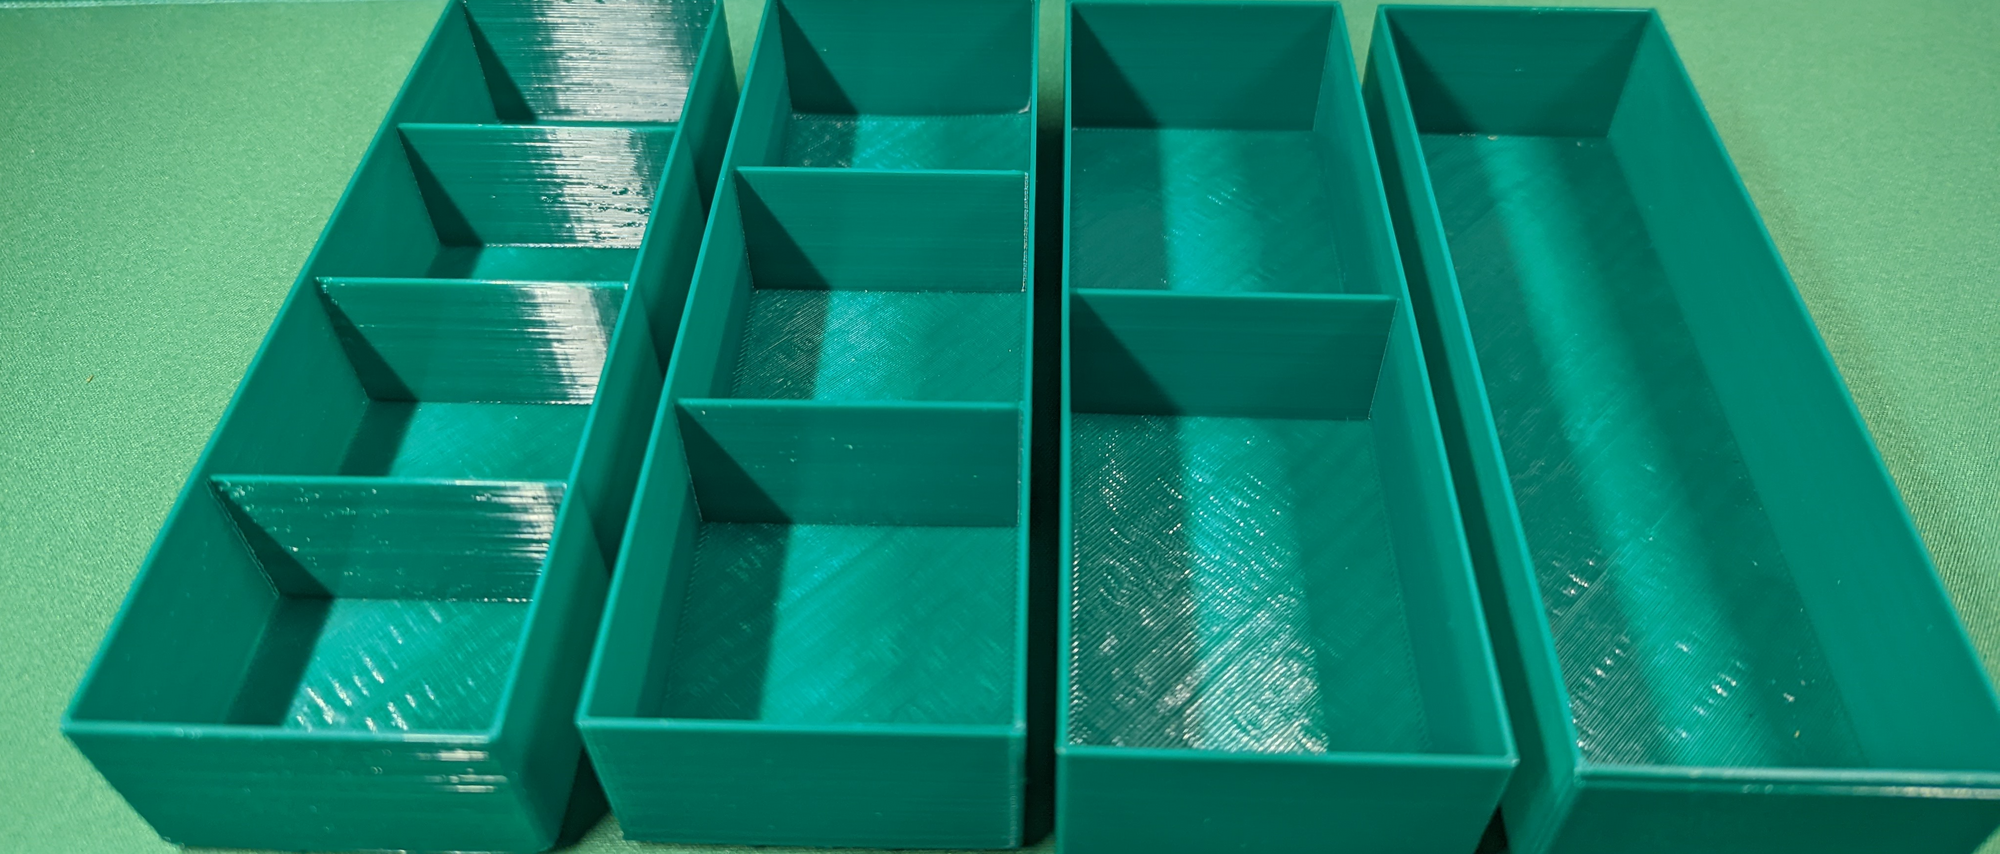
Storage Trays
Starting with the title image, there are storage trays! They have a configurable number of fixed dividers inside of them for either some smaller parts or some parts of smaller quantity, and they have two small "feet" on one end that helps them stay inside of the frame when fully pulled out.
There is no handle on these trays as there is no need for one - they intentionally extend beyond the depth of the frame which allows the wall at the end of the tray to act as a handle. This both offers the same functionality, and slightly extends the maximum size of the components that can fit inside.
Storage Frames
The storage frames also exist, and they also function, mostly! There are some issues with tolerances that cause problems when you live in the bargain bin for 3D printers, but overall they do fit together correctly and can be handled as a single object once combined.
Frame Border
The border pieces also exist, and offer a flat border that goes around each side. It could optionally be rounded at the very corners but I did not like the compromise I had to make on the overall thickness of the border. Also local to my printing setup, the border pieces bring out the worst in my printer and I will have to do a whole bunch of manual finishing to get the border completed. For the time being I have completed the bottom to prove that it works and provide a mostly balanced edge for the containers to sit on.
Ok, but where are they?
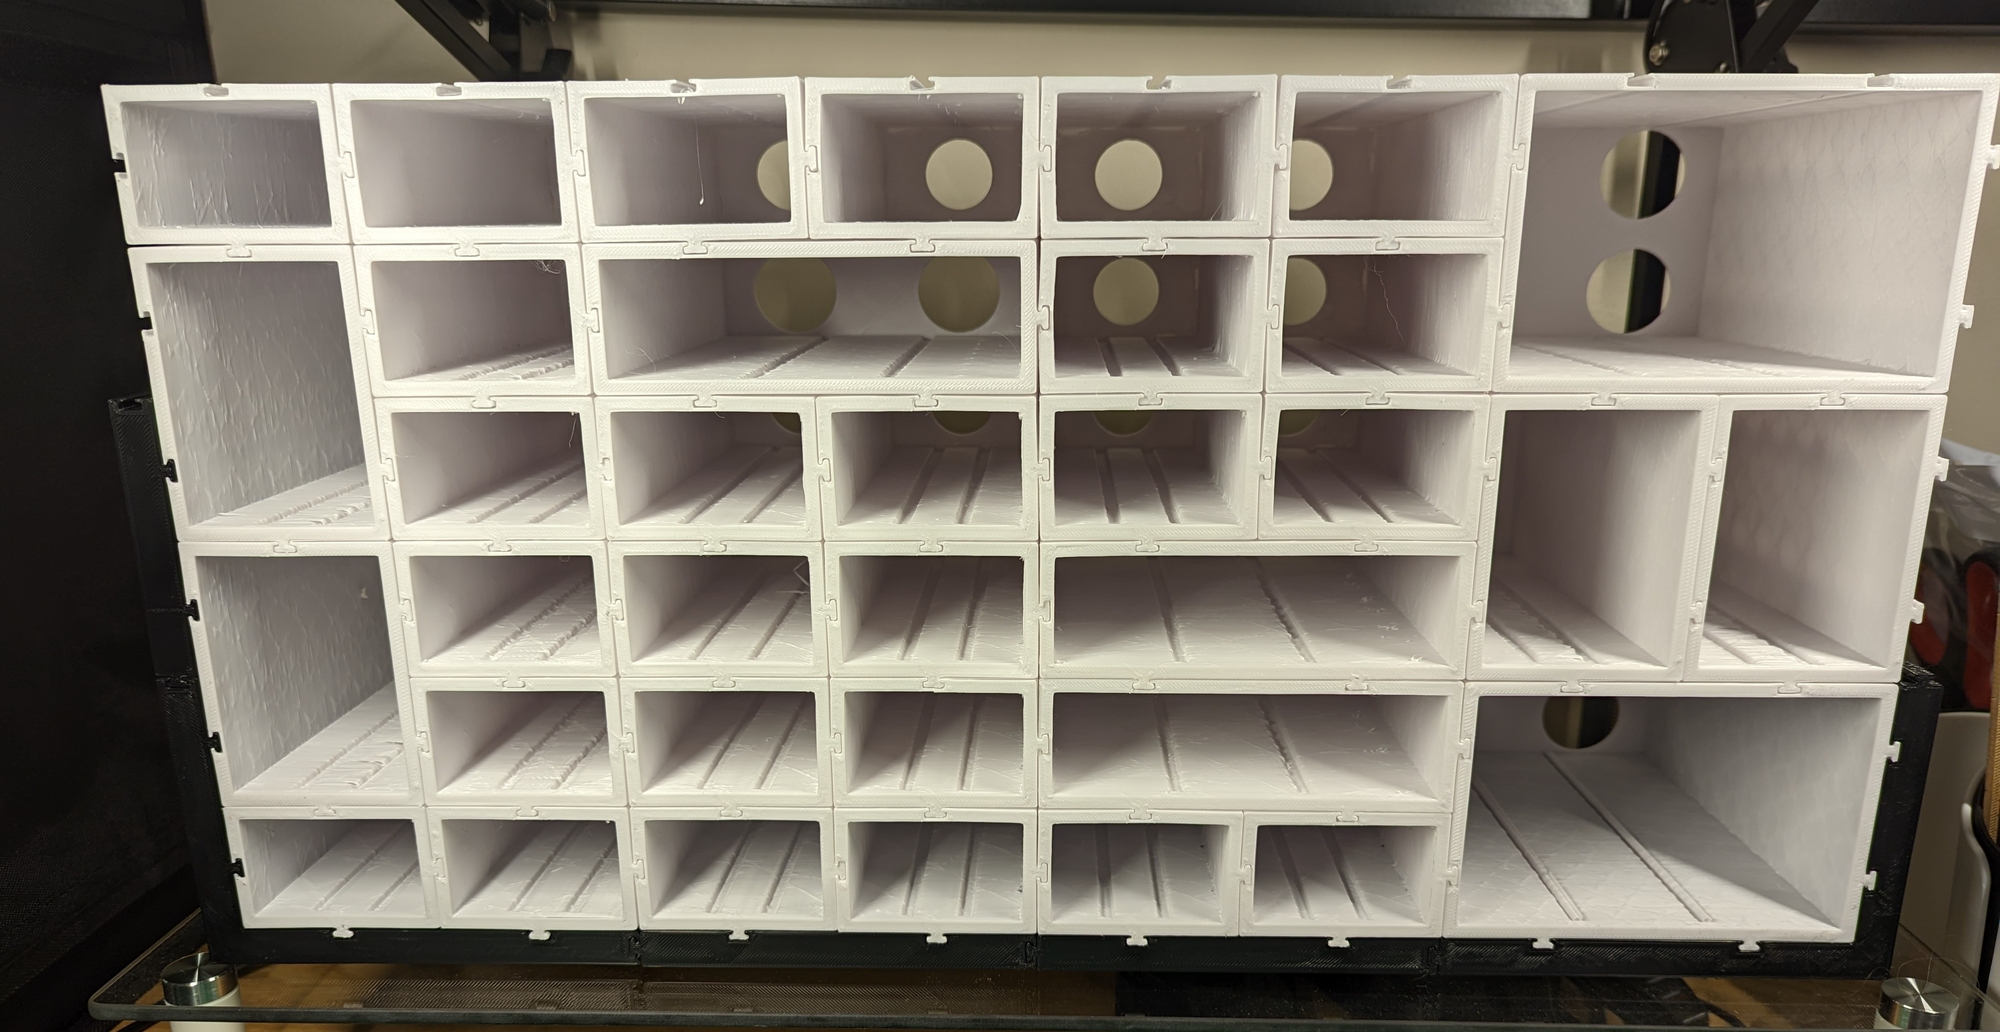
On display here is the modular sizing system, and all of the frame components - 1x1, 2x1, 1x2, and 2x2 frames all fit together correctly, and scale up to any size (with eventual structural compromises of course).
With some of the trays installed:
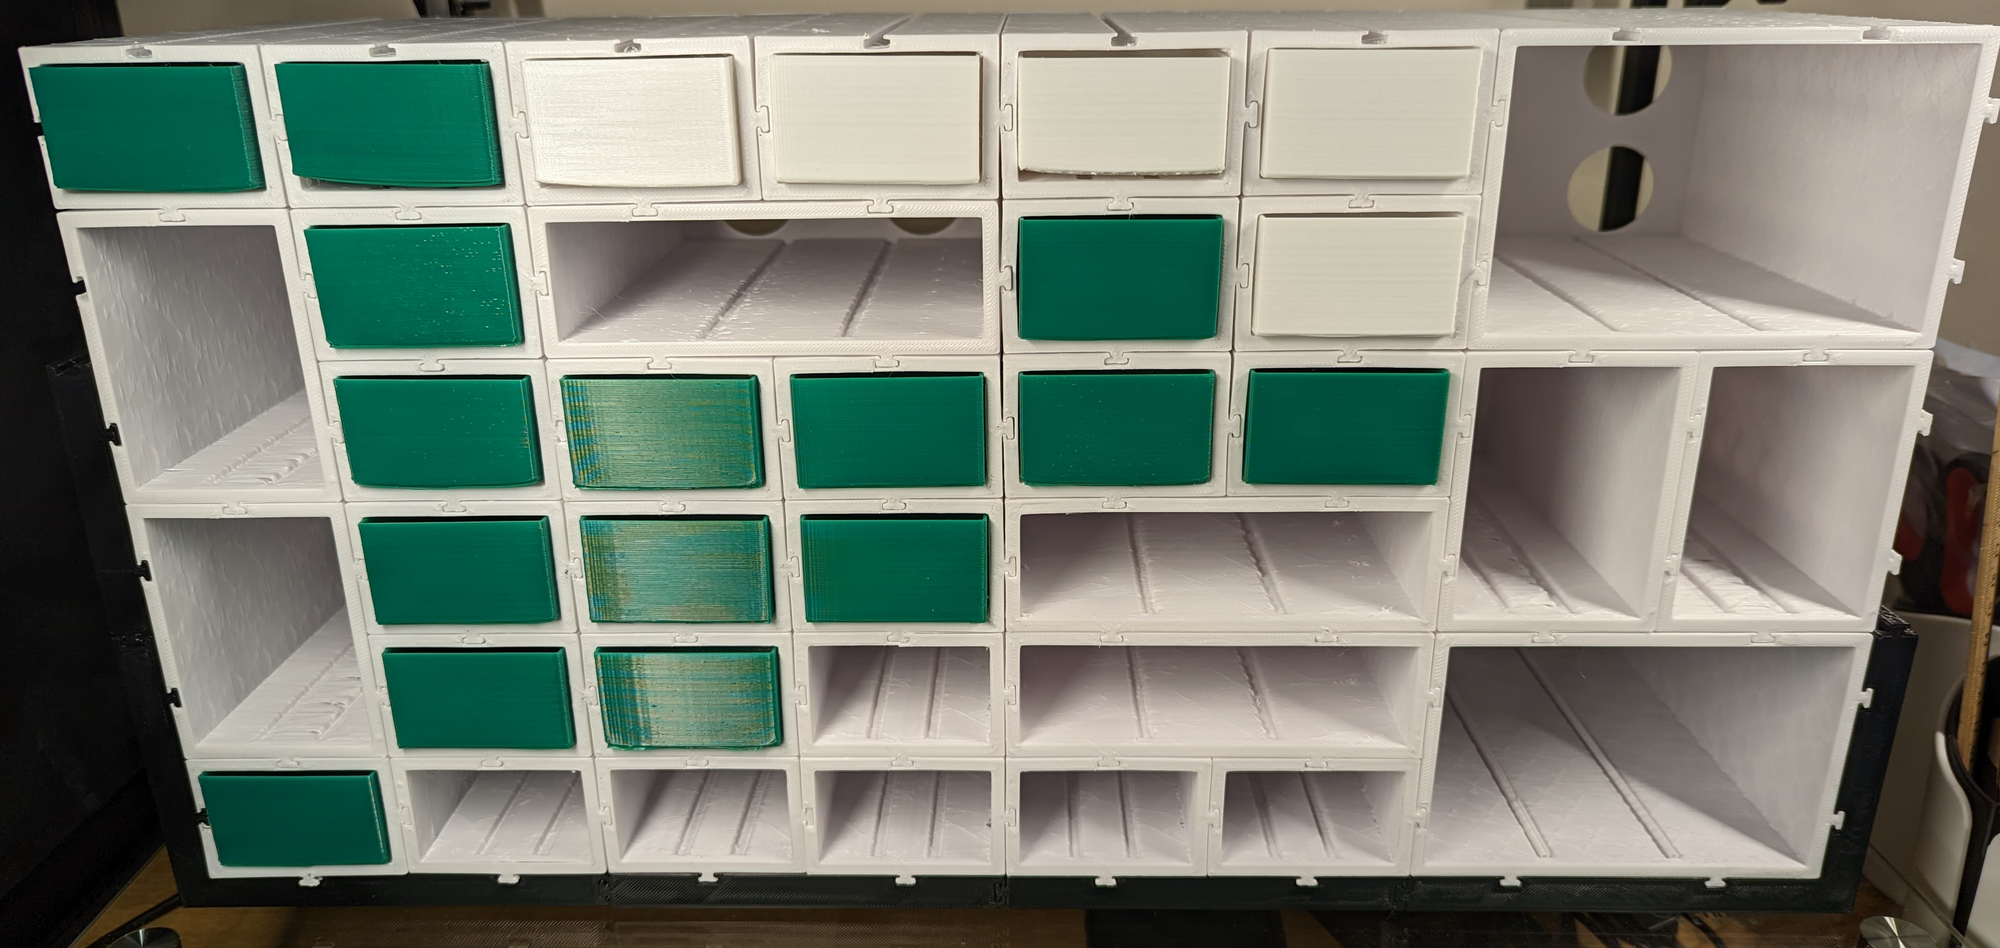
Overall I am incredibly happy with how things are going despite the increased timeline. The trays for the different sizes containers are all ready to go, but the 3D printer has really done itself in this time as one of the system fans has packed it in.
The goal initially was to colour coordinate the trays to the different system families the parts inside belonged to (Sony consoles will be blue, Microsoft consoles will be green, etc.) but we will see how that comes along, this first build is not going to be big enough to house all the different parts that can potentially break across all the families.
Hopefully soon after getting the 3D printer up and running again this will spark some momentum going forward, and I can reclaim both the desk space that these parts are currently occupying, and the desk space occupied by the parts that will end up inside of these trays.