Building a Monthly Planner
A post highlighting my current planning/journaling/note taking solution, with a custom set of pages printed and bound together each month.

My First Happy Planner
In late 2024 I bought a Happy Planner for the first time, and started using it for 2025. This was a labourious process as the shipping on smaller Happy Planner orders killed anything I was looking at, and I had almost given up on the idea entirely. However, I then realized that if I was willing to completely compromise on the design of the planner, Amazon had a select few in stock.
So I did compromise, and a couple days later I had something to get started with.
While this was a fine entry into the world of trying to be more organized, I was quickly feeling the pains of the layout on a daily basis. I don't know about you, but considering the marketing material Amazon lists for the layout:
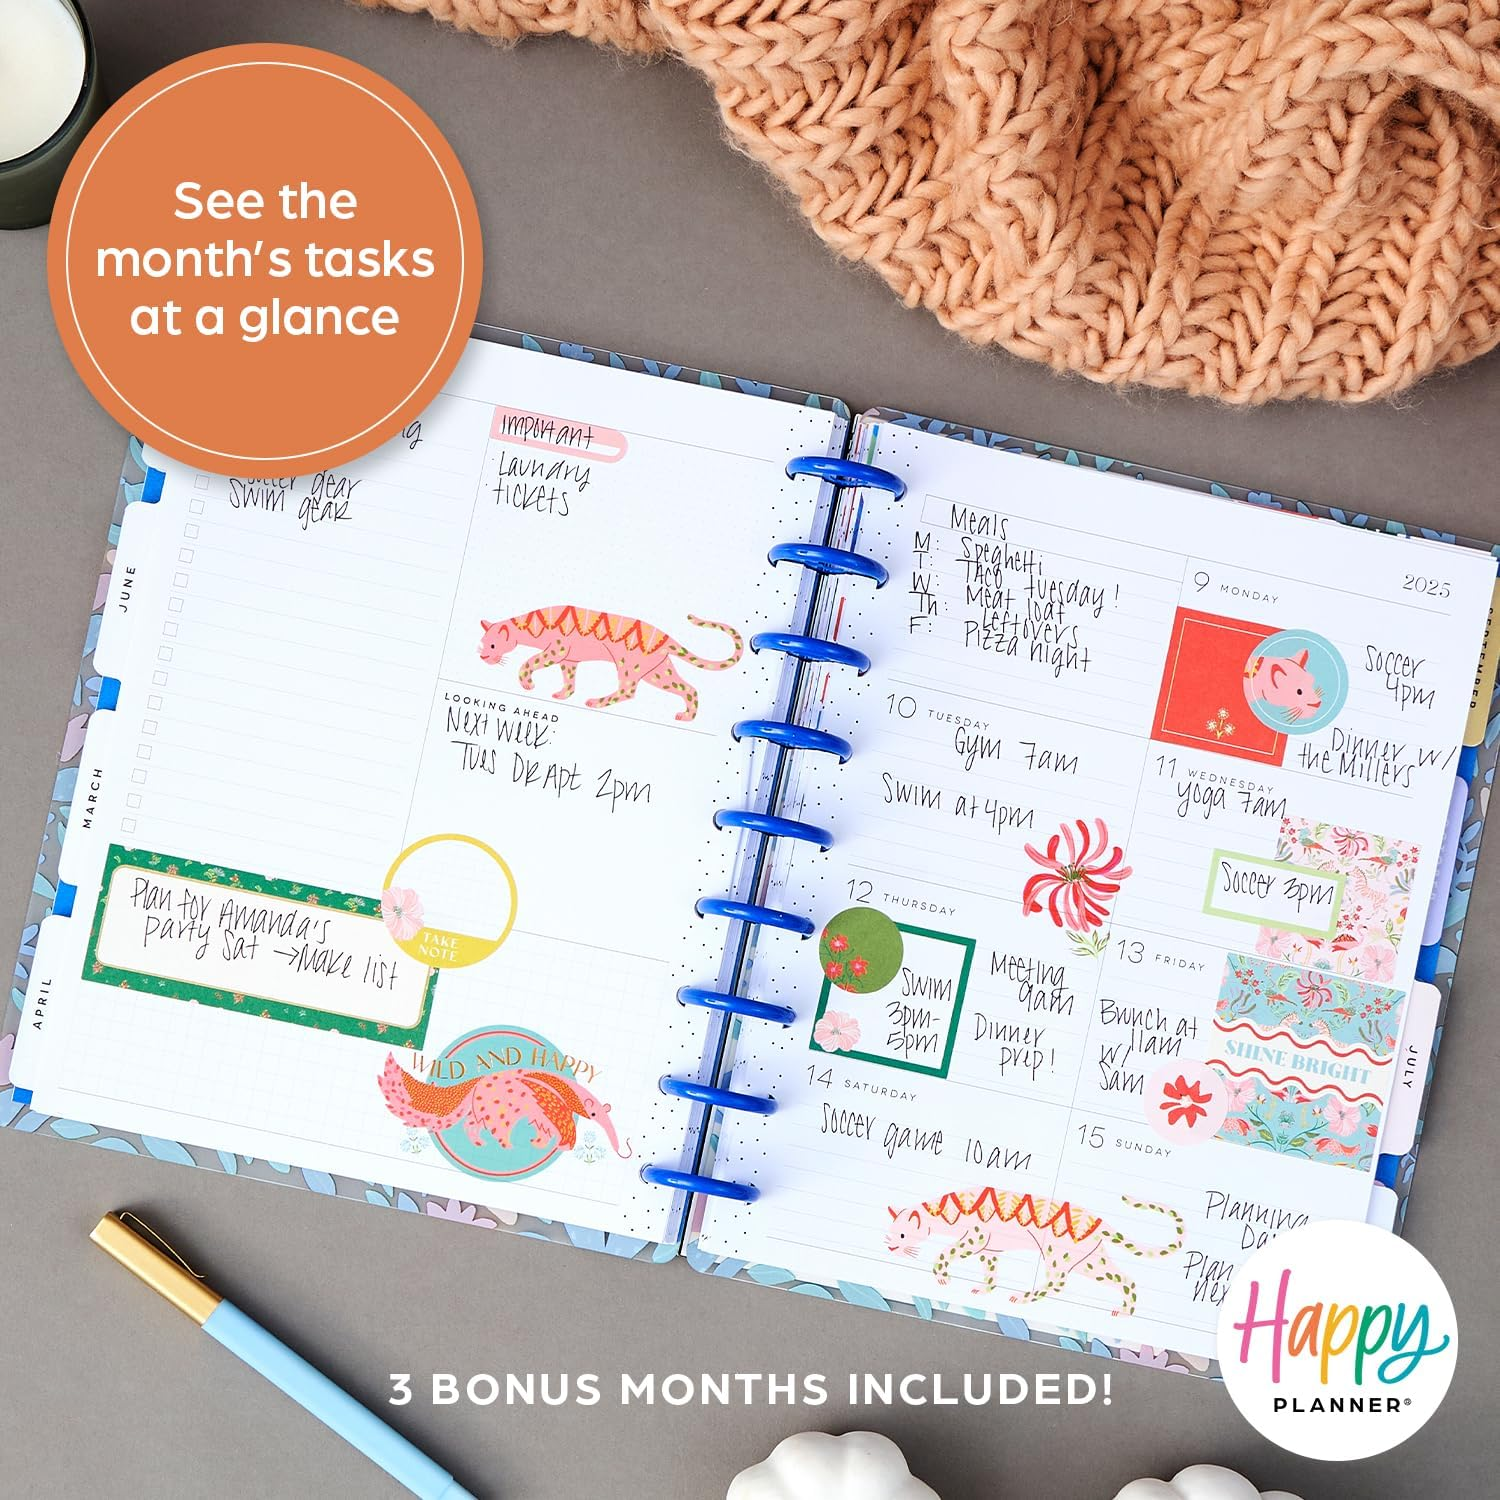
My personal needs for a planner include a decent amount of note taking, and jamming 7 days onto a single side of 7x9.25 paper wasn't cutting it. I was running out of space on a given day before lunch, and a lot of the noteworthy happenings weren't occurring until the evening. I tried adding pages into the planner myself but that quickly makes a month impossible to navigate, and ultimately decided that this just wasn't the right format for me.
I looked around for a while at other opportunities, and nothing really looked like it was going to work out. I needed something that adapted to varying needs each day without being overly busy, and while there are various templates and formats available out there none of the ones I came across looked like they would do an exceptional enough job to cause me to want to print my own planner.
Hemlock & Oak are again too dense for proper notes to be included.
Day Designer has a ton of different pages available, but the core daily pages are still too time/schedule based.
OnPlanners.com had a few templates that came close like the Boho Style Weekly Planner, but the marketplace nature of the site meant trying to piece things together was quite the hassle.
So ultimately, using little bits from all of the various places I decided that I would give printing my own daily planner/notebook/journal a go back in October.
First Versions
Some of the content from the first version I put together I'm still using, unchanged. Most of the daily format remains the same changes since this version have largely just been additions each month as needed.
Except for the printing strategy.
October and November saw single-sided printing.
The additional width from essentially using twice as much paper as necessary definitely made the planner feel more complete, as it was lacking much of the retrospective and daily insertions that are present in the modern versions.
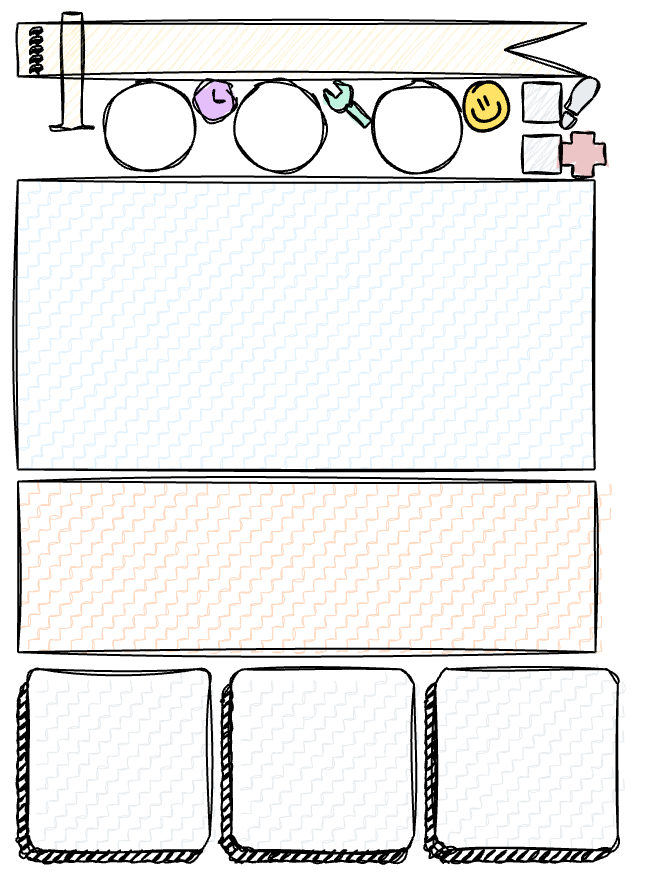
From top/down and left/right, this includes:
- A titlebar for the date
- A measure of how efficient we felt we were with time on that day (Usually 1-10)
- A measure of how productive we felt we were on that day (Usually 1-10)
- A measure of how we felt our mood was on that day (Usually 1-10)
- Whether we managed to get some exercise in or not (usually walking)
- Whether we managed to make healthy decisions or not (daily vitamins, etc)
- A large free-form field for general notes of the day
- A smaller, visually distinct free-form field for notes that carry more importance
- 3 smaller fields for individual highlights from the day (a brief summary of a meeting, appointment being scheduled at a certain time, etc.)
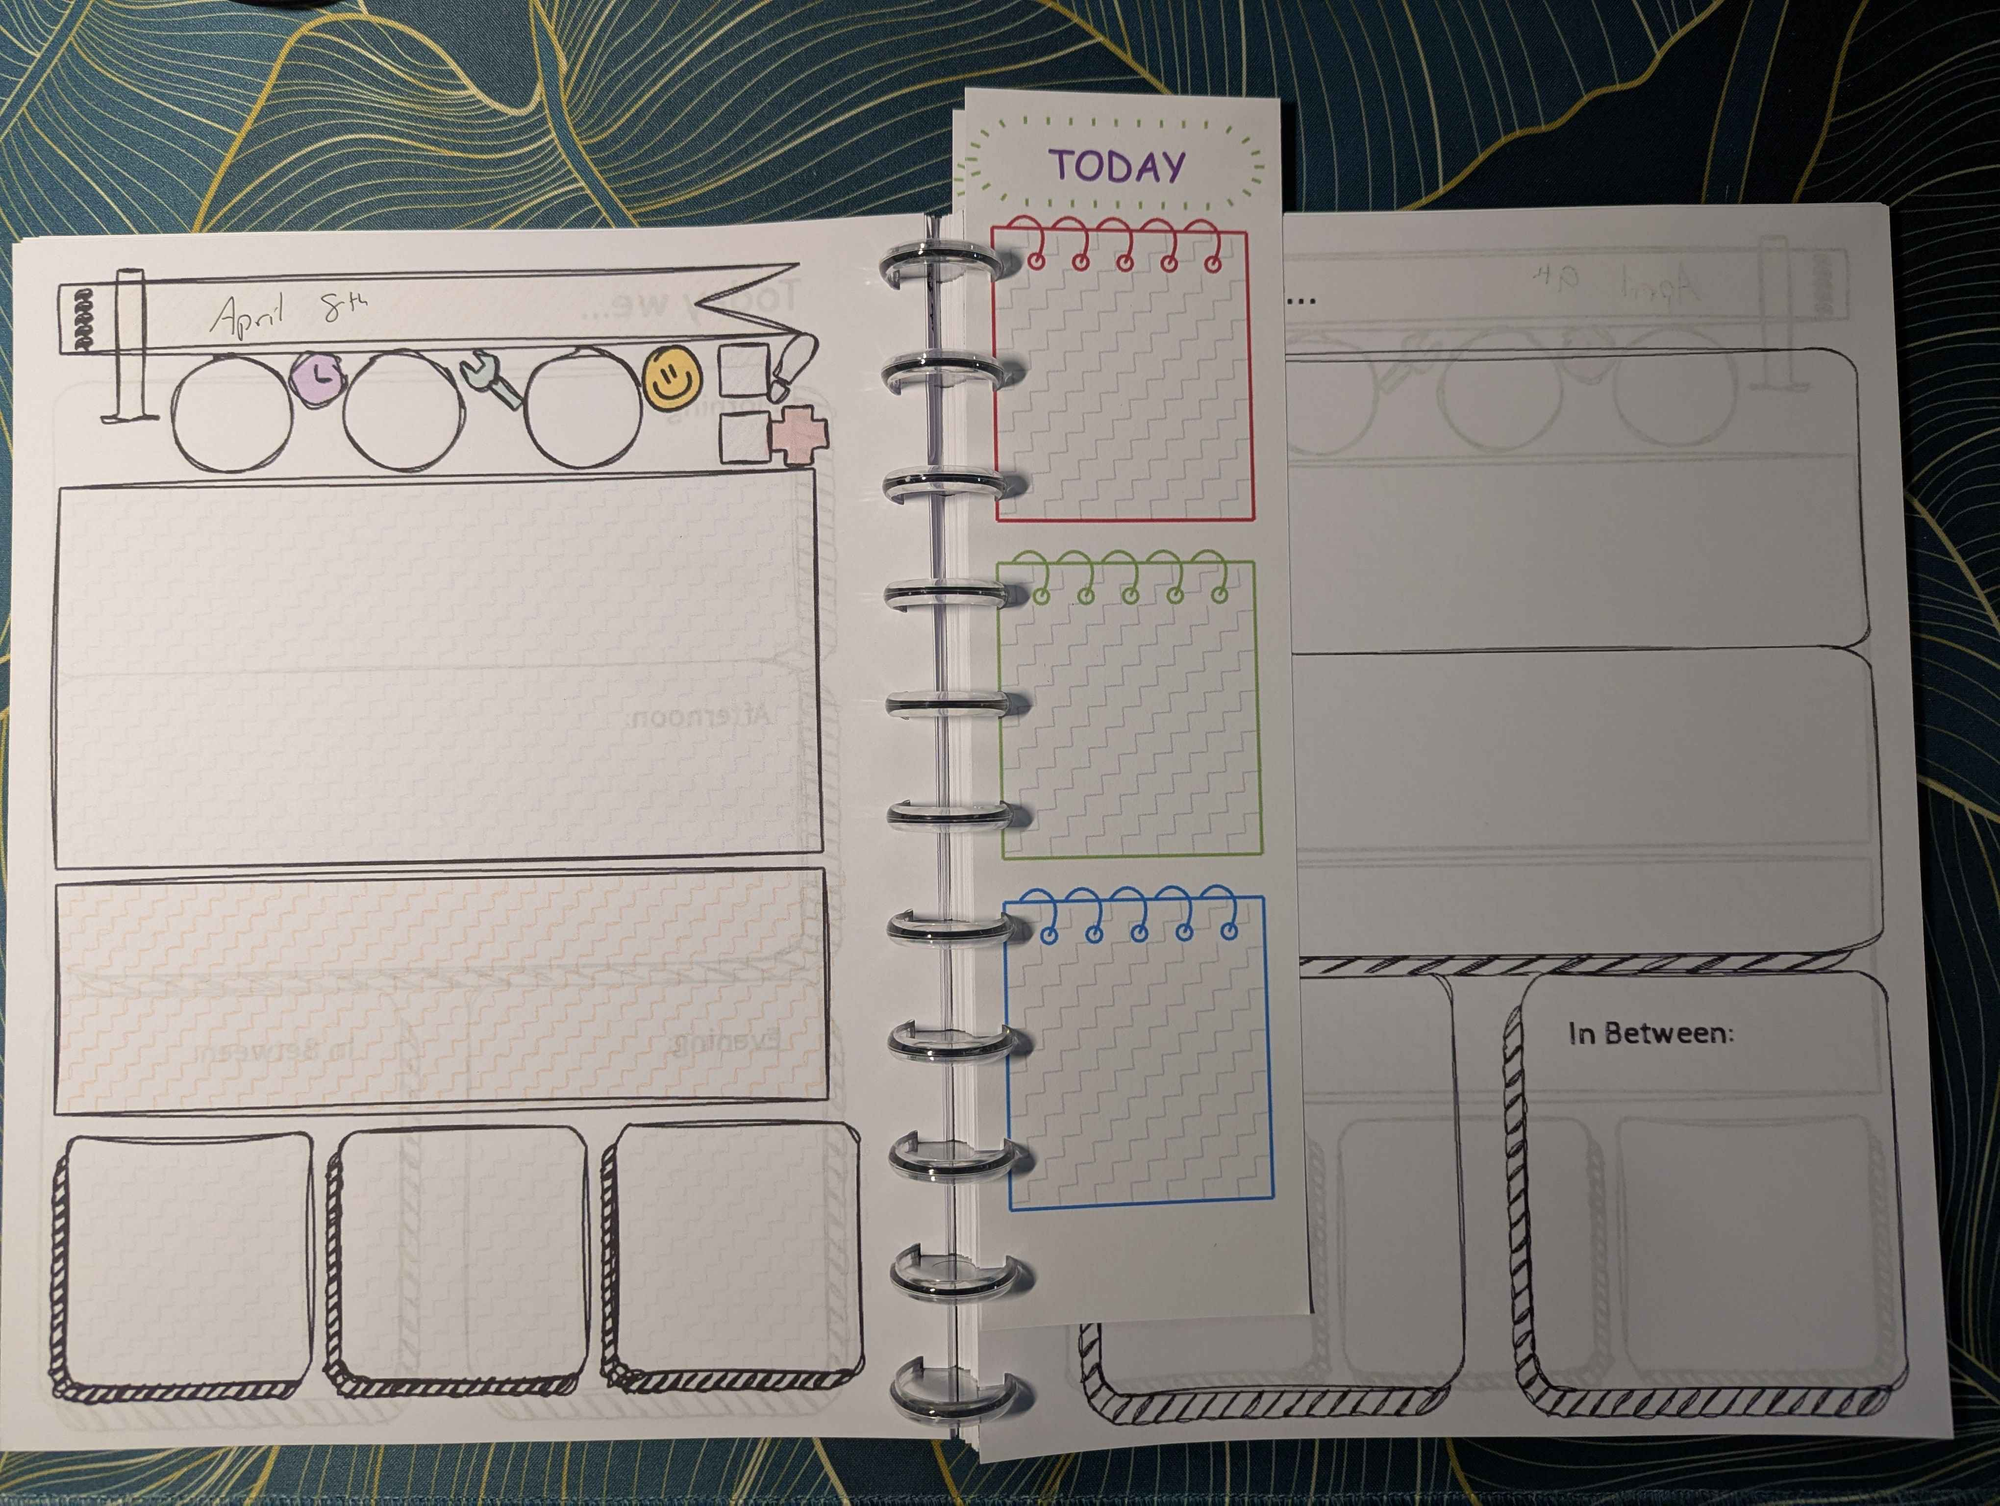
And that was about all it contained. The Daily Summary page made an appearance after a few weeks, but I'm still not happy with the state it's in and it'll likely see changes or replacement soon. However, the most important thing is, it provides closure on a specific day. When printed the above page and the daily summary page sit on separate physical papers (the book can be opened so that both are visible at the same time) and any number of inserts can be added as needed throughout the day. A larger note page for an important meeting, big idea/project breakdowns, dividers to mark the current day, anything at all.
I think that's the core principle that makes this approach work for me where so many others I looked at fail. The start and end of a day being on separate pages means I can add as much content between them as I like, as needed.
Modern Versions
Thankfully, after some mild harassing, the single-sided printing approach is gone and we're printing double sided pages as we should. This does leave an awkward page near the start where there is a Day Summary page all on its own, but that's a mild problem to have and one that can be solved in the future with some more creative double sided printing.
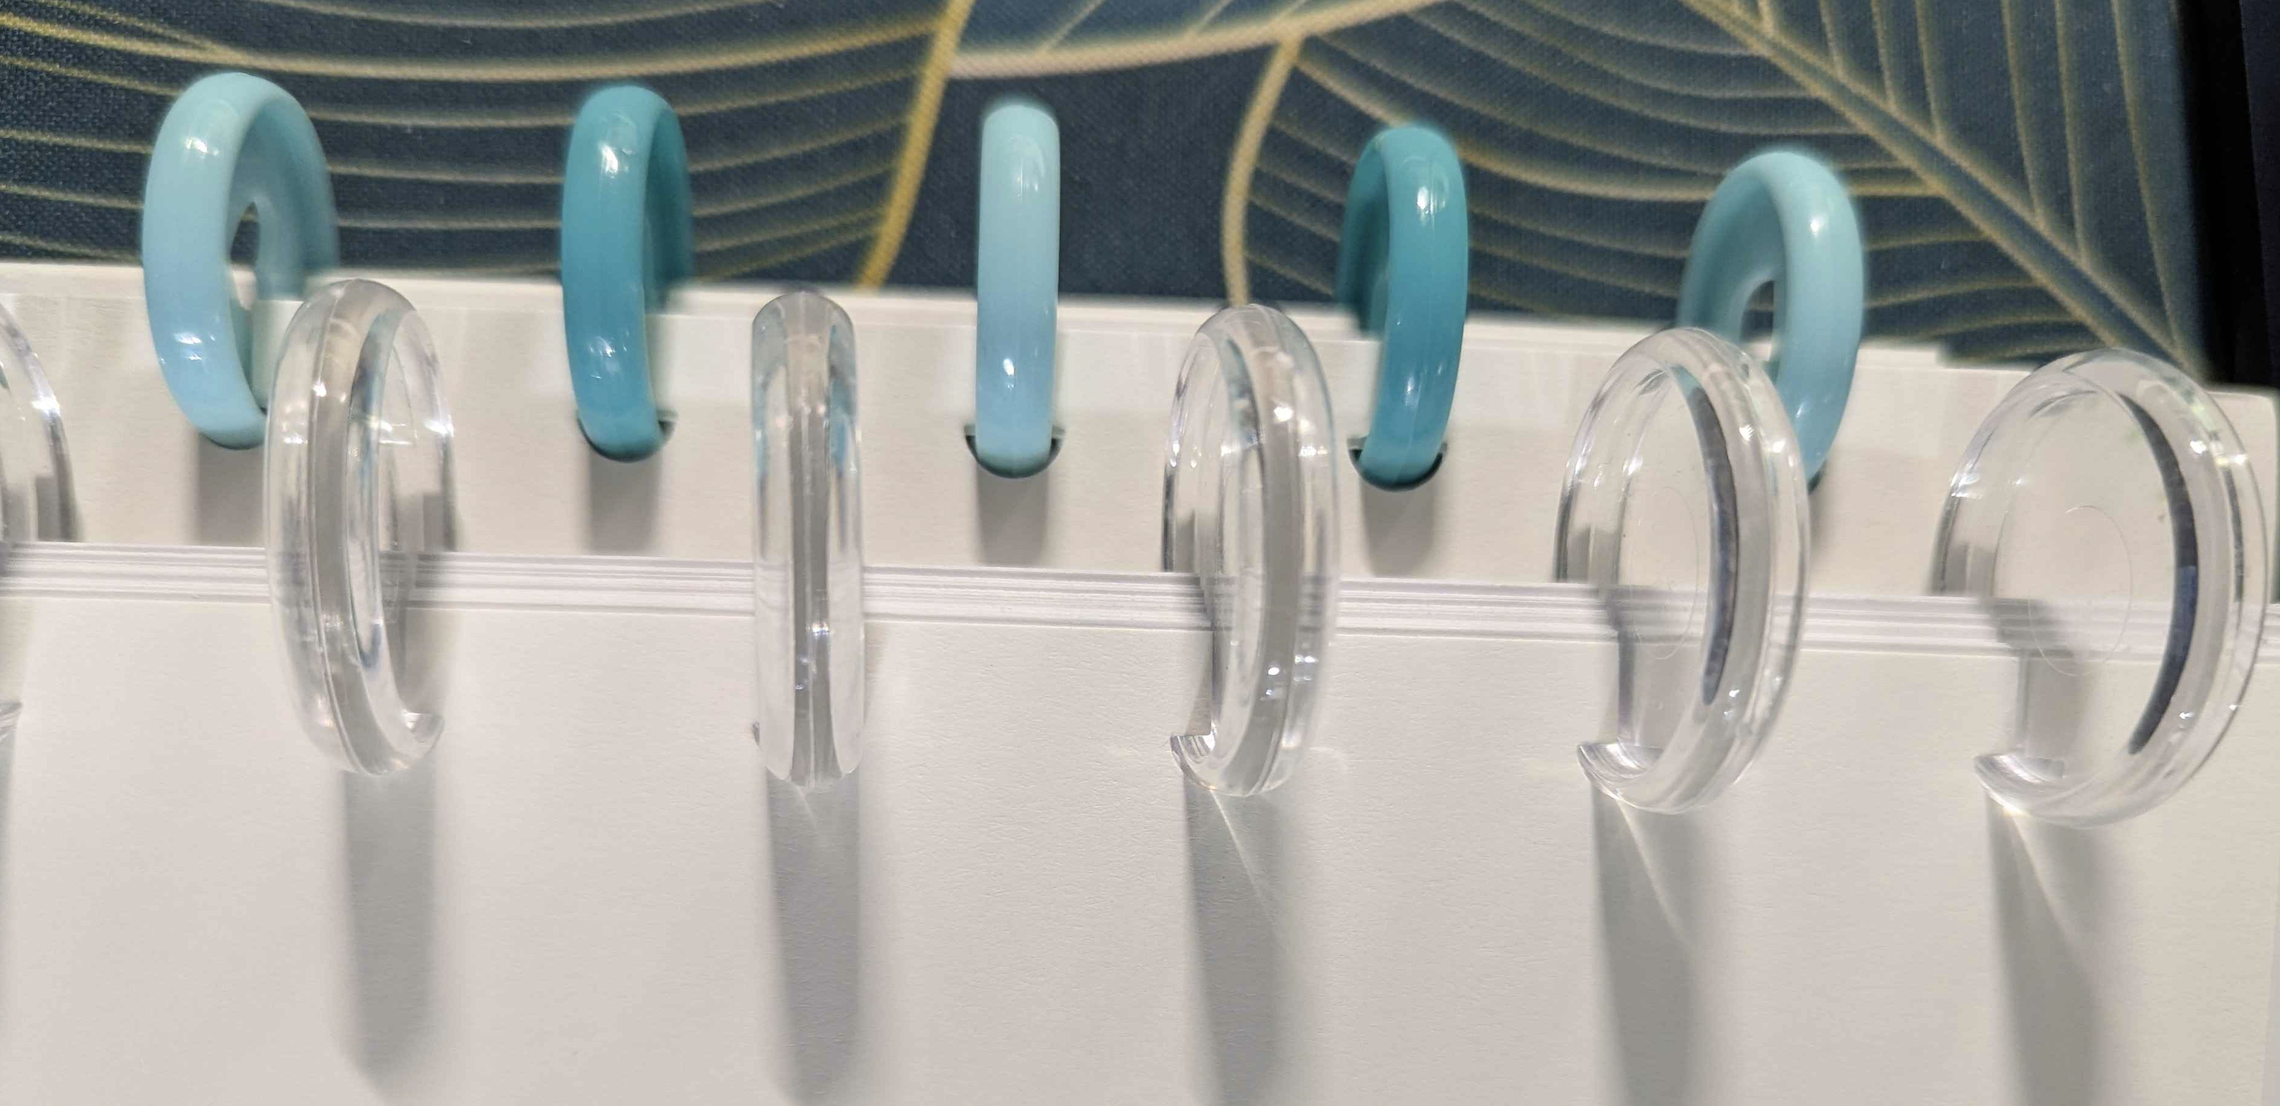
Now that it's a little more finalized, I've also taken to printing multiple months worth of daily pages at the same time, which cuts down on the monthly work needed to put the planner together. I picked up a series of little paper shelves to facilitate storing all of the different pages involved, and I've picked up a couple different colours/sizes of the binding discs as well from various locations.
March was a set of larger clear discs, while February was an alternating pattern of blues.
However, there are still 2 major challenges that this modern version faced through until March, with April's version attempting to fix one of them.
April Changes
The original Happy Planner uses its own size of paper, 7x9.25 inches.
All of the planners I had been printing previously maintained this size.
This meant I was trimming down 8.5x11 paper every month, and generating a non-zero amount of scrap paper in the process. Plus, it took up most of the construction time when putting one together.
So this month, I've finally decided to give 8.5x11 a go as a format.
The mushroom-punch I use (Happy Planner branded) is already the full size 11 inch format, so there's nothing I need to change in the tooling other than the removal of the cutting step. I've resized all the exported images that represent the planner sheets to the new size, and hopefully this is a change I get to carry forward. I don't love that it's bigger in a bag now (the Happy Planner size felt right being carried around) and it feels a bit less purpose-built being the same sized paper as everything else. I do love that I'm not spending an evening trimming paper down though, and we'll see if the change sticks.
One challenge this upsizing does bring is the format of the divider inserts. Previously printing the daily/monthly dividers a bit taller than the 9.25 inch height pages meant they were clearly visible from the top for quick navigation. Now I'm going to need to attempt to offset them in the punch to get the same result. Not the end of the world, but not having them go to the bottom of the page is mildly upsetting.
Remaining Problems
The remaining problem is of course, being left-handed and trying to write on a left-bound piece of paper. This is difficult at the best of times in 3-ring scenarios, and switching to a 9 or 11 disc setup only makes it worse.
I don't have a solution to this (I could bind the paper at the top and/or print horizontally I suppose, but that seems a bit too awkward) other than to be mindful of what I put on the right side, but so far this is a problem I've dealt with my entire life and dealing with it a little more in this planner/notepad/journal adventure has been no different.
The Last Variable - Paper Types
The last variable I've had to play with in putting these together is paper types. While I'm not (yet?) laminating or otherwise printing the covers on any sort of plastic, I am using different paper weights to make some pages stand out more than others.
Creative use of different paper weights, finishes, and brightness are one final tool used to give a self-printed planner a little extra polish and professionalism, even when the pages aren't all quite cut to the same size.
Current Recipe
As I'm putting the April book together, here's the "recipe" for the pages being inserted:
- (1) Title Page
- (30) Daily Title/Daily Summary pages (Double Sided!)
- (4) Weekly Summary List/Checklist (Double Sided!)
- (1) Month Divider/Title Page
- (1) Monthly Goals
- (1) Monthly Personal Achievements
- (1) Monthly Work Achievements
- (1) Monthly Closing
- (1) Extra Divider/Title Page
- An assortment of extra pages to be slotted in when I'm not at home with the collection of printed pages to pull from
- (1) Backing Page
Final Thoughts
While it's definitely not in its last iteration, I'll be curious to see if there's any other impact this month with using the larger size. I expect I'll be using it more this month regardless which makes now the right time to give it a try - however, as always, it's only useful if I continue to use it.
Page Repository/Source
Whatever state the pages are currently in, you can find a copy of both the source (they're created using SketchWow!) and the image files for the pages over at https://github.com/tharbakim/monthlyplanner.
At the moment the repository doesn't properly package the output files as a release, and the images are instead included in the repository themselves.